
TLDR
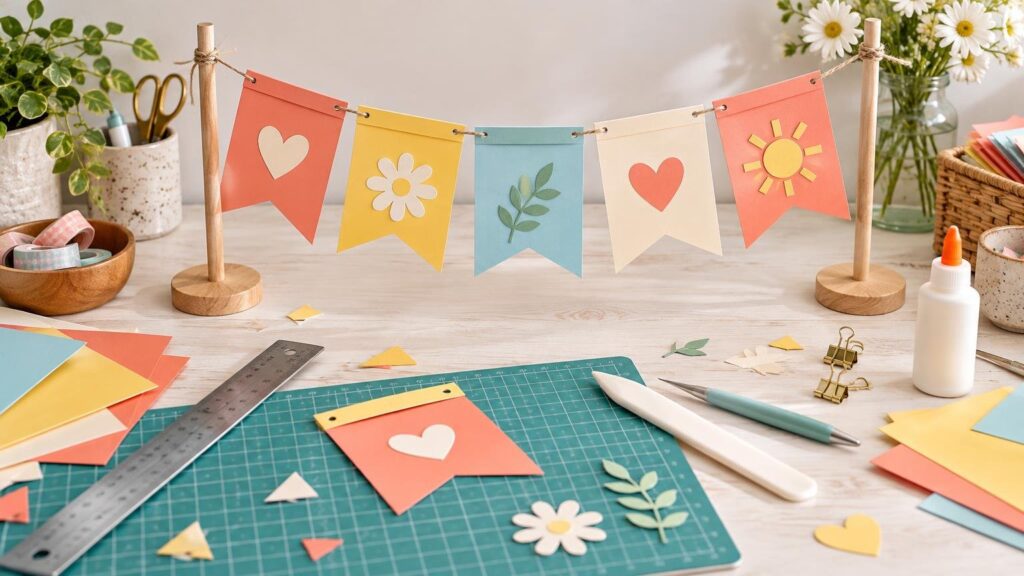
The simplest answer to how to make cardstock paper banner panels hang flat is to control three separate problems: curling paper, a sagging support line, and pennants that rotate on the line. Use medium cardstock for an adaptable starting point, make one consistent template, apply dry adhesive sparingly, and attach every panel at two points or with a folded top channel. For a long banner, add a center support rather than pulling the string excessively tight.
A flat-looking banner depends as much on its structure as its decoration. Heavy wet glue can make layered panels wavy, one loose hole can let a pennant spin, and a long piece of twine can droop even when the individual flags are perfectly flat. The method below treats the paper, adhesive, and hanging system as one project.
Materials for a flat cardstock banner
- Cardstock for the pennants
- Contrasting cardstock or lightweight paper for letters
- Pencil, ruler, and one paper template
- Scissors, craft knife with a protected cutting surface, or a cutting machine
- Scoring tool or blunt folder if the design has folded top channels
- Permanent double-sided tape or a tape runner
- Twine, ribbon, cord, or a narrow cardstock backing strip
- Removable wall hooks, tape, or another suitable hanging method
- Optional hole punch and lightweight embellishments
Cardstock package weights are useful categories, but they are not exact thickness equivalents across every brand or finish. Cricut describes 65 lb cardstock as light, 80 lb as medium, and 100 lb as heavy. It also defines cardstock generally as paper heavier than 50 lb or 120 gsm. For a typical indoor letter banner, medium cardstock is a practical place to begin because it has more body than lightweight paper without making every cut and fold difficult. See the fuller comparison of 65 lb, 80 lb, and 100 lb cardstock for paper crafts if you are choosing among packages you already own.
Use lighter stock when children will cut the shapes by hand or when the banner is deliberately soft and temporary. Consider heavier stock for large, unlayered flags, but test any fold before committing to the whole project. Coated, glittered, and specialty sheets can behave differently from plain cardstock even when the package lists a similar weight.
Choose the hanging structure first
Decide how each panel will connect before cutting the pennants. That choice determines whether you need holes, tabs, fold allowances, or a backing strip.
| Structure | How it works | Best reason to choose it |
|---|---|---|
| Folded top channel | An extended top edge folds over string or ribbon and is taped closed. | The channel creates a broad attachment area and hides the support line. |
| Two-point attachment | Two holes or adhesive points hold each pennant near its upper corners. | Two connections help keep the front facing forward instead of pivoting around one hole. |
| Continuous backing strip | Pennants attach to a long ribbon or cardstock strip. | The strip helps align the top edges and makes spacing easier to control. |
| Two support lines | A second line secures the lower portion of each panel. | Useful in a drafty display area when controlling rotation matters more than hiding the support. |
None of these structures guarantees a perfectly rigid display. A folded channel can still slide, a backing strip can bend, and two lines can look busy. For most indoor banners, start with either a folded top channel or two upper attachment points. Reserve the second support line for displays that repeatedly turn away from the viewer.
Plan the message and panel spacing
Write the complete message before cutting. Count one panel per letter, then decide how you will show spaces between words. You can leave a larger gap, insert a blank pennant, or change the pennant color at each word break.
Next, make a quick paper mockup. A compact pennant might fit one letter comfortably, while a wide room or long viewing distance may call for larger panels. Rather than relying on a universal banner size, print or draw one sample letter, place it on a proposed pennant, and view it from the expected distance. Leave a visible margin around the letter and enough material above it for holes or a folded channel.
Lay the planned sequence across a table and estimate the finished span, including word gaps and bare line at both ends. If that span is too wide for the display area, reduce the panels or divide the message into two rows before doing the detailed work.
How to make cardstock paper banner panels consistently
- Make one master template. Draw a rectangle, swallowtail, triangle, or shield shape on scrap cardstock and cut it carefully.
- Add the attachment area. Mark two hole positions, or extend the template above its finished top edge to create a fold-over channel.
- Test the complete structure. Cut one pennant, add a sample letter, attach it to the intended line, and hang it for a short trial.
- Trace and cut the remaining panels. Keep the same edge of the template facing upward so small asymmetries do not alternate across the banner.
- Arrange every cut panel in message order before adding letters. This catches missing characters, reversed color patterns, and spacing mistakes early.
Scissors are entirely suitable for simple pennants. Keep the template still, use long cuts on straight edges, and rotate the cardstock rather than forcing your wrist around sharp corners. A craft knife can produce straight interior cuts, but it should be used on a protected surface and kept out of children's reach.
If you use a cutting machine
Do not assume one pressure setting will work for every sheet. The finish, thickness, blade condition, and mat condition can all affect the cut. Cricut specifically recommends making a test cut because results vary by material. Its cardstock instructions identify LightGrip mats for lighter cardstock and StandardGrip mats for medium cardstock. Cricut’s official cardstock instructions provide current machine-specific handling guidance.
After cutting, turn the mat over and peel the mat away from the cardstock rather than lifting the paper sharply from the mat. Cricut recommends this method to help reduce curling. If edges tear, stop before cutting the full batch. Check for an intricate design that is too small for the material, a dull or dirty blade, poor mat contact, or a setting that needs adjustment.
Score only the parts that must fold
A flat pennant with two punched holes does not need scoring. Score only when the design includes a folded top channel, tab, or reinforcement. Place the score line exactly where the finished top edge should be, score before folding, and then crease along the line without crushing the surrounding panel.
A trace, score, cut, fold, and attach sequence is used in Fiskars’ structured paper-project instructions, and the same order is helpful when a banner includes tabs or channels. Fiskars’ scored paper-project example shows that general construction sequence. Scoring tools create a controlled crease; Cricut distinguishes a single scoring wheel for everyday cardstock from a double wheel intended for thicker or coated materials. For more help with pressure and cracking, use this guide to scoring cardstock for clean folds.
Fold a test scrap from the actual pack first. If the surface cracks, try gentler scoring, check whether the fold behaves better in the other direction, or switch to a two-point attachment with no fold. Do not plan a folded channel with a material expressly described as unsuitable for folding; Cricut, for example, says its Smart Paper Sticker Cardstock is not intended to be folded.
Add letters without warping the panels
Place all pennants on a flat work surface and mark a consistent visual center. Centering by eye is often more useful than measuring only the bounding box because letters such as I, W, and J have very different shapes. Arrange every character before sticking anything down, then step back and inspect the complete message.
For layered cardstock, apply thin, even strips of permanent double-sided tape near the letter edges and through the center where needed. 3M presents its permanent double-sided tape as a paper-craft adhesive and contrasts tape application with the drips and air bubbles associated with white glue. A tape runner offers similar low-moisture convenience for lightweight layers.
Wet craft glue can still work, especially for tiny or irregular details. Use small dots or a very thin film instead of saturating the paper. Press the assembled panel beneath a clean sheet of scrap paper and a flat book while it sets, provided the adhesive instructions allow it. Too much moisture on only one side is a common route to a wavy-looking panel.
Assemble the banner in structural order
- Place the completed panels in their final reading order.
- Cut a support line longer than the displayed message so there is room to secure both ends.
- Attach the first and last panels loosely to establish the usable span.
- Add the remaining panels, keeping their top edges aligned and leaving deliberate word gaps.
- Set the banner on a flat surface and check the letter sequence again.
- Add bulky bows, tassels, rosettes, or dimensional decorations only after the support structure works.
- Hang both ends, view the banner from across the room, and adjust panel spacing.
- If the middle visibly droops, add a discreet center support rather than overtightening the line.
Cricut’s party-decoration example uses cardstock banner panels assembled on twine or string, so either material can suit this basic construction. Ribbon provides a broad surface that may resist rolling more than thin round twine, while twine is visually lighter. The better choice depends on whether you want the support to disappear or help stabilize the top edge.
Troubleshooting a banner that will not hang flat
- Panels curl forward or backward: Remove them if possible and press them flat between clean sheets. Replace moisture-heavy layers with dry adhesive on the next attempt.
- Layered letters look wavy: Use less adhesive, spread it more evenly, and let each panel set flat before hanging.
- A fold cracks: Test a lighter score, reverse the fold direction on a scrap, or eliminate the fold and use two attachment points.
- Pennants spin on twine: Move from one center hole to two upper holes, use a broad ribbon, close a folded channel more snugly, or add a discreet lower support.
- The center droops: Shorten the unsupported span, reduce heavy embellishments, or add a center hook. Pulling harder can stress the paper and wall attachments.
- Top edges look uneven: Align the pennants on a table against a ruler or straight strip before fixing their final positions.
- Machine-cut pieces curl: Peel the mat away from the cardstock instead of pulling the cardstock upward.
- Machine-cut edges tear: Repeat the test cut after checking the blade, mat contact, design detail, and selected material setting.
Can construction paper work?
Construction paper can work for a short-lived classroom or children's banner, especially when easy cutting matters more than crisp structure. It is generally more flexible than cardstock, so use smaller panels, a continuous backing strip, or two-point attachment. Avoid heavy layered decorations that ask the soft paper to support more weight than necessary.
How to store the banner for reuse
Remove the banner carefully and lay it flat rather than folding the finished pennants. If the panels slide on the line, stack them in order with clean paper between embellished surfaces. Otherwise, coil the support line loosely around the stacked panels without bending their corners. Store the banner in a rigid folder, document box, or shallow container away from moisture and direct sunlight.
The best next step
Build one complete sample pennant before producing the full message. Test its cardstock, letter adhesive, fold or attachment points, and support line together. If that sample remains flat and faces forward when hung, repeat the same construction for the batch. That small trial is faster than repairing a finished banner with curled layers, spinning flags, or a support line that cannot carry the design.