
TLDR
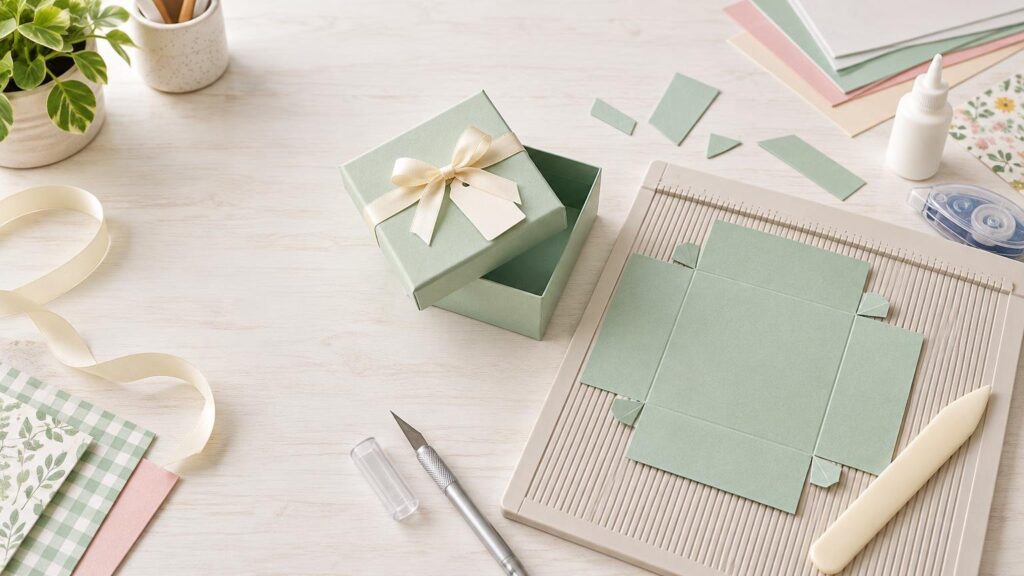
This cardstock gift box scoring board project makes a square lift-off box without a cutting machine. Cut a 6 × 6-inch base and score it 1½ inches from every edge. Cut a 4⅝ × 4⅝-inch lid and score it ¾ inch from every edge. Score while the sheets are flat, pre-fold every crease, cut consistent corner tabs, and dry-fit both pieces before adding adhesive. The finished base has an interior measuring approximately 3 × 3 × 1½ inches, while the lid is about ¾ inch deep.
The measurements are simple, but success depends on accuracy. Square cuts keep the walls upright, controlled scoring prevents ragged folds, and a test fit catches a tight lid before the tabs are permanently glued. Treat the lid measurement as a practical starting point rather than a universal formula because thick, textured, and coated cardstock can change the final fit.
Materials and tools
- One 6 × 6-inch sheet of cardstock for the base
- One 4⅝ × 4⅝-inch sheet of cardstock for the lid
- Manual scoring board with a scoring tool
- Bone folder or another smooth paper-folding tool
- Paper trimmer, or a metal ruler, craft knife, and cutting mat
- Narrow double-sided tape or tacky liquid craft glue
- Pencil and ruler for checking measurements
- Optional tissue, paper shred, ribbon, tag, or flat embellishments
If using a craft knife, cut on a protective mat, keep fingers behind the ruler, and direct the blade away from your body. A paper trimmer is usually the easier option for beginners because it helps keep all four edges square.
Choose cardstock that will score without becoming bulky
Medium-to-heavy cardstock is a practical starting point for a box this size. Cricut uses 65 lb/176 gsm, 80 lb/216 gsm, and 100 lb/270 gsm as example cardstock categories, but those numbers are orientation points rather than guarantees that every brand will behave identically. Coatings, fibers, texture, and the manufacturer’s basis-weight system all affect how a sheet cuts and folds. For a closer look at those common categories, see how 65 lb, 80 lb, and 100 lb cardstock behave in paper crafts.
If this is your first box, begin with an uncoated sheet that feels firm but still folds cleanly. Very light cardstock may produce flexible walls. Very thick stock can make the tabs bulky and reduce the lid clearance. Specialty finishes can also crack when folded sharply, so score and fold a narrow scrap before cutting the project pieces.
Choose adhesive according to your working style. Narrow double-sided tape is clean and grips immediately, but it gives little time to correct a crooked corner. Tacky liquid craft glue allows brief repositioning, although too much can squeeze out or warp the paper. Apply either option in a narrow strip near the outer edge of each tab.
Cardstock gift box scoring board measurements
| Piece | Cut size | Score from every edge | Approximate finished size |
|---|---|---|---|
| Base | 6 × 6 inches | 1½ inches | 3 × 3 × 1½ inches inside |
| Lid | 4⅝ × 4⅝ inches | ¾ inch | 3⅛ × 3⅛ × ¾ inch inside |
The lid plan gives an estimated ⅛ inch of total extra width, or 1/16 inch on each side, compared with the base interior. That small allowance is only a starting point. Make a quick paper mock-up or assemble the base first if the fit is critical. For thick cardstock, the lid may need slightly more room; thin stock may work with less.
1. Cut two accurate squares
Cut the base to exactly 6 × 6 inches and the lid to 4⅝ × 4⅝ inches. Check each piece with a ruler before moving on. Opposite edges should match, and the corners should form right angles. Even a small taper can produce one wall that leans or a lid that binds at one corner.
If the cardstock has a directional pattern, decide which way the design should face before cutting. The side you want visible should be placed face down when the tabs are eventually folded inward, although the scoring-board orientation can vary with the material and tool.
2. Score the base and lid while they are flat
Place the 6-inch base against the top and side guides of the scoring board. Score at 1½ inches, rotate the sheet 90 degrees, and repeat until all four sides are scored. Follow the same process for the lid, scoring ¾ inch from every edge.
Keep the sheet firmly against the guides and pull the scoring tool with light, controlled pressure. The goal is to compress a fold path, not cut through the surface. The Vaessen Creative scoring-board instructions recommend light pressure and multiple passes for thicker cardstock rather than one forceful pass. Scoring all lines before cutting the tabs also keeps the sheet flat and easy to align.
3. Pre-fold and burnish every score line
Fold each wall along its score line, then run a bone folder over the folded edge. Scoring creates the path; folding and burnishing afterward establish the crisp crease. Use firm, even pressure without grinding the tool into the paper.
For ordinary uncoated cardstock, make one test fold to determine which direction gives the cleanest exterior. Thicker or coated materials often need more careful scoring, and Cricut’s scoring guidance generally directs those materials to be folded into the score line. Test a scrap whenever the decorative surface begins to split or turn white.
4. Cut four consistent corner tabs
Keep each piece in the same orientation. From the top edge, cut down the two vertical score lines until each cut meets the first horizontal score line. Repeat from the bottom edge. You will make four cuts in total, producing four corner tabs attached to the left and right walls.
Stop precisely at each intersection. Cutting beyond it weakens the bottom panel; stopping short creates a lump that prevents the wall from rising cleanly. For a neater interior, trim a very narrow wedge from the free side of each tab. Remove only a sliver so the tab can fold behind the adjacent wall without protruding.
5. Dry-fit the base before applying adhesive
Raise all four base walls and fold the corner tabs behind the top and bottom walls. Hold the corners together without glue. The bottom should remain flat, all walls should meet at right angles, and no tab should extend above or beyond an adjacent wall.
If one corner leans, check the cuts and folds before changing the measurements. A score that missed its mark, a crease that was not fully folded, or a tab caught on an uncut paper fiber can all pull the box out of square.
6. Secure the base one corner at a time
Open the dry-fitted base and place adhesive on the outward-facing side of one tab—the side that will touch the inside of the neighboring wall. Raise the walls again, align their top edges, and press the tab firmly behind the wall. Repeat at the other corners.
Work one corner at a time rather than coating every tab at once. With liquid glue, hold each corner until it grips. A small square object placed temporarily in the corner can help maintain a right angle, but do not force an object into the box if it strains the cardstock.
7. Assemble and test the lid
Repeat the same tab-cutting, dry-fitting, and gluing sequence for the lid. Let both pieces settle, then lower the lid straight over the base. It should slide on without bowing the base walls and lift off without needing to be pried.
If the unglued lid mock-up is too tight, recut it slightly larger rather than forcing it. Increase the blank by 1/16 inch for a subtle adjustment or ⅛ inch for a more noticeable one, keeping the ¾-inch score depth unchanged. If it is too loose, reduce the blank in similarly small increments. Always test the revised size before decorating.
Finish the box without affecting the fit
Add decorations only after confirming that the lid fits. Flat paper shapes, a small tag, or a ribbon belly band add interest without changing the lid clearance. Tissue or light paper shred can cushion a small gift, but avoid overfilling the box because upward pressure can bow the lid.
If wrapping ribbon around the closed box, tie it snugly enough to stay in place but not so tightly that it crushes the corners. For patterned cardstock, use the pattern on the lid and a coordinating solid on the base if matching the design across every fold feels distracting.
Troubleshooting common box problems
| Problem | Likely cause | Practical fix |
|---|---|---|
| Cardstock cracks at the fold | Score is too shallow, pressure is too harsh, or the finish is brittle | Test the opposite fold direction and make multiple light scoring passes on a scrap. |
| Walls lean outward | Cuts or scores are not square, or corners moved while drying | Re-burnish the folds and hold each glued corner at a right angle until secure. |
| Tabs show outside the box | A tab was folded over rather than behind the neighboring wall | Keep all tabs inside and attach them to the inner face of the adjacent wall. |
| Glue squeezes out | Too much liquid adhesive was applied | Use a thin line and wipe excess immediately with a clean scrap of paper. |
| Cardstock warps | The sheet absorbed too much liquid glue | Use less glue, switch to narrow tape, and let the box dry without heavy pressure. |
| Lid is too tight or loose | Stock thickness or cutting variation changed the clearance | Adjust the lid blank in 1/16- to ⅛-inch increments and test again. |
How to resize the box
For a square base, add twice the wall height to the desired interior width. A 4-inch-square box with 2-inch walls therefore starts with an 8 × 8-inch blank: 4 + 2 + 2 = 8. Score 2 inches from every edge.
For a rectangular box, calculate each direction separately. A base with a 5 × 3-inch interior and 1-inch walls needs a 7 × 5-inch blank. Add twice the wall height to the 5-inch length and to the 3-inch width.
For the lid, begin with an interior length and width about ⅛ inch larger than the base, then add twice the desired lid depth. This is a test-fit formula, not a universal standard. The thicker the assembled base walls, the more likely you are to need extra clearance.
Quick questions about scoring and assembly
Can I make the box without a scoring board?
Yes. Align a metal ruler with each measurement and draw a bone folder or blunt scoring tool along the edge. Work on a protective surface with a little give. A scoring board is faster for repeated parallel lines, but careful measuring can produce the same basic structure.
Should I score before cutting the tabs?
Yes. Scoring first keeps the square intact against the board guides. Once the tabs are cut, the separated corners can shift or catch while you align the sheet.
Can I use a cutting machine?
A cutting machine can cut the outline and may score the folds with a compatible tool, but this project is designed for manual construction. If adapting it, preserve the same panel dimensions and make a material test because scoring tools behave differently on everyday, thick, and coated cardstock.
Make the first box a fit test
Start with the 6-inch base and 4⅝-inch lid, but think of the first cardstock gift box as a working sample. Accurate cuts, gentle scoring, well-burnished folds, and a dry fit matter more than rushing to the adhesive. Once the lid slides on cleanly and the corners stand square, record the exact cardstock and lid measurement you used. That tested combination becomes a dependable template for future gifts.