
TLDR
Choose a paper plate when a child needs a large, ready-made shape to color. Choose cardstock when you want flat pieces that can be pre-cut, arranged, and layered. For the easiest activity, combine them: use a plate as the face or creature body and three to five large cardstock shapes as ears, eyes, a nose, a hat, or other details. Markers or crayons and a glue stick keep the base project quick and relatively low-mess.
If you are comparing paper plate vs cardstock crafts kids can manage with limited help, neither material is the universal winner. A plate removes the need to trace or cut a large base, while cardstock is useful for sturdy flat details. The child’s comfort with coloring, choosing pieces, gluing, and supervised cutting matters more than selecting one material for the entire project.
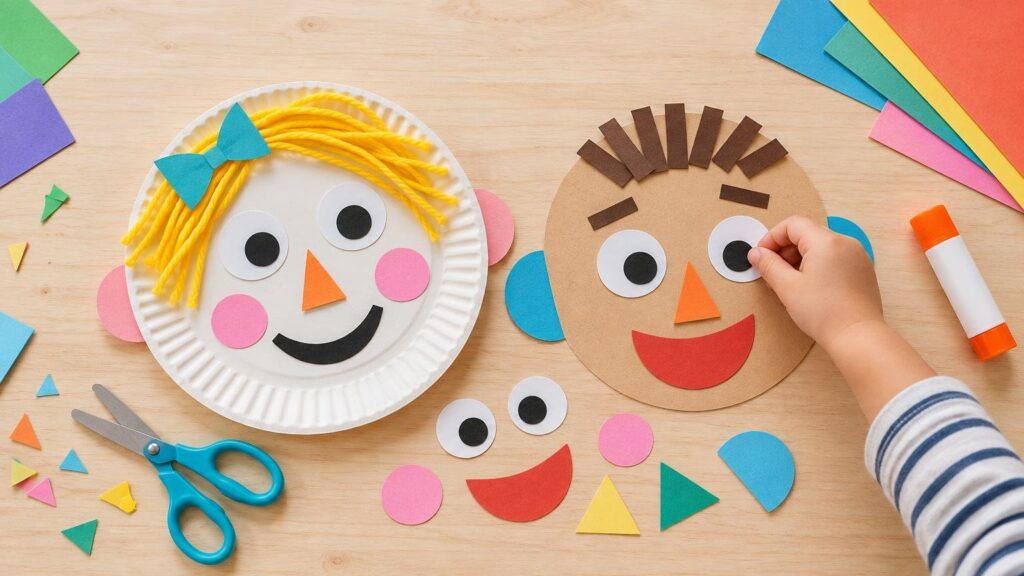
A make-a-face activity demonstrates the difference without turning the craft into a long lesson. An adult can prepare a few broad cardstock shapes, and the child can decorate the plate, choose the features, and decide when the character looks finished.
Paper Plate vs Cardstock Crafts for Kids: The Quick Comparison
| Craft goal | Easier starting material | Why it helps |
|---|---|---|
| Draw a large face or animal | Paper plate | The round base is ready to decorate, so no tracing or large cutting is required. |
| Build a flat collage | Cardstock | Flat sheets and pre-cut pieces are easy to arrange before gluing. |
| Choose and glue simple shapes | Cardstock pieces | Large circles, triangles, rectangles, and ovals give the child clear choices. |
| Keep preparation short | Paper plate | One plate can become a face, sun, flower, animal, or imaginary creature. |
| Make sturdier flat details | Cardstock | Cover papers are generally heavier and more durable than lighter text-weight papers. |
| Combine drawing with construction | Both | The plate supplies the canvas, while cardstock adds ears, hair, horns, or other raised details. |
Using both materials is a well-established project format rather than an unnecessarily complicated extra step. For example, Crayola’s paper-plate llama activity combines a plate with a cardstock half-circle. The useful idea is the division of labor: let the plate provide the large shape and let cardstock provide the details.
Easy Project: Make-a-Face Material Test
This open-ended project can become a person, animal, monster, robot, or completely invented creature. Calling it a “material test” also takes away pressure to copy a finished example. The goal is to notice what each material makes easy and create a character from a small number of choices.
Supplies
- One plain, unused paper plate
- Three to five large cardstock shapes
- Crayons or markers appropriate for the child
- One glue stick suitable for paper crafts
- Scrap paper, a placemat, or another washable work surface
- Optional child-appropriate scissors, used with active adult supervision
Keep the first set of shapes broad and simple. Good options include two triangles for ears, one oval for a nose, a rectangle for a hat, and two wide strips for hair or whiskers. Pieces around the width of two or more adult fingers are generally easier to pick up and position than tiny confetti-like details, though you can adjust them to the child’s dexterity.
You do not need a particular cardstock weight for this project. Use a sheet that can be cut cleanly with the tools available and that does not feel frustratingly stiff. If you want to understand how common paper-craft weights behave when cutting, folding, and layering, see this guide to 65 lb, 80 lb, and 100 lb cardstock.
Setup in two minutes
- Place the plate in the center of the work surface.
- Put the cardstock shapes beside it in one small pile or shallow tray.
- Set out only two or three coloring tools at first.
- Open or uncap materials that would otherwise interrupt the activity, but keep them within adult control.
A limited selection can make starting easier. More colors and shapes can always be offered after the child has begun. This is not about restricting creativity; it is about making the first decision manageable.
Make the character
- Decorate the plate. Add eyes, a mouth, spots, stripes, or any marks the child wants. It does not need to look like a conventional face.
- Choose the cardstock pieces. Let the child arrange them without glue first. Rotate a triangle to see whether it becomes an ear, tooth, beak, or hat.
- Glue the chosen pieces. Apply glue to one piece at a time, then press it onto the plate.
- Stop when the child says the character is finished. A face with two drawn eyes and one paper nose is as complete as a heavily decorated creature.
Some plates have slick coatings, deep rims, or textured surfaces. Test one marker line and one small glued scrap before depending on that plate for a group activity. If the marker smears or the paper lifts, switch coloring tools, use a plain uncoated plate, or keep the cardstock details inside the flatter center area.
Match the Child’s Role to Their Current Skills
A successful young-child craft does not require the child to perform every production step. Cutting can be an adult preparation task while the child remains responsible for the creative decisions.
For beginning makers
Pre-cut every piece. The child can color the plate, choose between two shapes, point to a placement, and press glued pieces down. A marker-only face is also a complete version if gluing becomes tiring.
For children ready to do more
Offer a wide cardstock strip and invite the child to make one or two straight cuts with appropriate scissors and close supervision. Avoid using a universal age cutoff as a readiness test. One manufacturer, for example, labels its rounded-tip plastic safety scissors for ages three and up, but that label applies to the particular product and does not replace a caregiver’s assessment of the individual child.
Broad cuts are usually a better starting challenge than small circles, narrow fringe, or intricate outlines. An adult can draw a short cutting line if the child benefits from a visible target.
How to Keep the Craft Low-Mess
For the base project, use crayons or markers instead of paint, a glue stick instead of liquid glue, and large paper shapes instead of glitter or tiny loose decorations. Set out only what the current step requires. This keeps the table clearer and makes it easier to notice when the child is ready to stop.
- Color first, then bring out the glue.
- Keep unused cardstock scraps in a bowl or envelope.
- Give each child one plate rather than leaving a full stack within reach.
- Use a separate scrap sheet for testing markers and glue.
- Return caps to markers as the child changes colors.
- Put finished work on a designated drying or display surface, even if the glue feels dry.
If a child still mouths craft materials, omit small embellishments such as beads, sequins, pom-poms, and tiny paper shapes. Keep supplies under active adult control and follow the product’s labeling and intended use.
When selecting art materials, the Art and Creative Materials Institute’s classroom safety guidance explains that an AP seal identifies products that have undergone toxicological evaluation and are certified non-toxic when used as intended. That does not mean every product is appropriate for every child or every activity, so labels, age guidance, and supervision still matter.
When Paint Is Worth the Extra Step
Paint can add broad color coverage and a different sensory experience, but it changes the activity from quick assembly to a staged project. A painted plate may need to dry before cardstock details can be attached. Crayola’s paper-plate llama instructions, for example, separate painting, drying, and gluing into distinct stages.
Treat paint as an optional extension rather than a required supply. If you use it, plan a first session for painting and a second for assembling the face. Check the exact paint label instead of assuming all craft paint will wash out. Crayola states that its own Washable Paint washes from skin and most washable clothing, but that is a product-specific claim.
Ways to Simplify the Activity
- Marker-only face: skip cardstock and glue entirely.
- Two ears and a nose: provide only three pre-cut pieces.
- Choice board: offer two colors and two possible shapes rather than a large pile.
- Adult-glue version: the child points to the placement and presses each piece.
- Shared character: the adult draws one feature and the child chooses the next.
Simplifying the materials does not reduce the creative value. A young child may spend most of the activity naming the character, assigning emotions, or changing the position of one paper ear. Those decisions are part of the project.
Easy Extensions for Children Who Want More
- Add a cardstock speech bubble and ask what the character says.
- Glue or tape on a broad paper-strip handle to turn the face into a simple puppet.
- Write the character’s name on a cardstock label.
- Add folded cardstock tabs so ears or wings stand away from the plate.
- Create a second character and invent a short conversation.
- Use the finished character as the mascot for a DIY reward sticker chart.
If you add a handle, an adult should secure it and check that the connection is appropriate for how the puppet will be used. A wide folded cardstock strip is a paper-only option for gentle tabletop storytelling. There is no need to introduce hot glue, craft knives, or staples to complete the basic version.
Which Material Should You Choose?
Start with a paper plate when the ready-made circle is the main advantage: faces, suns, flowers, clocks, and round animals all benefit from that instant base. Start with cardstock when the activity is primarily arranging flat shapes, making a collage, or building a picture that should lie neatly on a page.
For most first attempts, use both. Put down one plate, offer three to five large cardstock pieces, and let the child color, choose, position, and press. Pre-cutting is a helpful accommodation, not a shortcut that makes the craft less meaningful.
Before beginning, test the plate’s surface, check every supply label, and decide whether cutting belongs in the activity or in the adult preparation. Then make one simple character. If the child is still interested when it is finished, extend the play with a name, speech bubble, or short puppet story rather than adding a bigger pile of materials.