
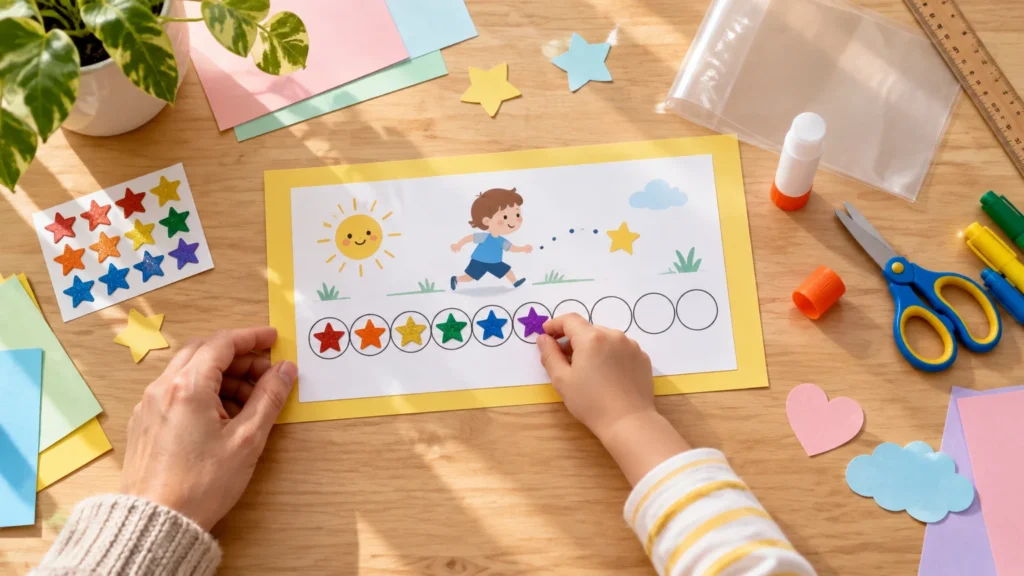
TLDR: For a simple diy reward sticker chart kids can understand, choose one clearly defined behavior, draw a short path of empty spaces, and let the child add one sticker each time they complete it. Use a picture for younger children, display the chart where they can see it, and decide what happens when the path is full before you begin.
You do not need a printer, template, or cutting machine. A sheet of paper, a marker, and stickers are enough. The best first chart is usually the one with the fewest moving parts: one routine, one kind of progress marker, and a reachable finish line. Once that works smoothly, you can make the chart reusable or expand it.
Quick project snapshot
| Project choice | Simple starting option |
|---|---|
| Main material | Letter-size paper or light cardstock |
| Layout | One path or row of empty spaces |
| Goal | One specific, positively worded action |
| Progress marker | Stickers, stamps, or drawn symbols |
| Child participation | Choose colors, decorate the border, and place earned stickers |
| Display | A visible, easy-to-reach location |
| Reusable upgrade | Sheet protector, laminate, or clear contact paper |
A caregiver should prepare the basic layout and explain the goal. A child can personalize the chart by choosing a theme, drawing along the edges, or coloring the progress spaces. Keep loose gems, beads, foam pieces, and other small embellishments away from children who might put them in their mouths. The U.S. Consumer Product Safety Commission explains how small parts can present choking hazards for young children, so close supervision and the age guidance on craft-supply packaging are sensible safeguards. Review the CPSC small-parts guidance
Choose one clear goal before decorating
Start by deciding exactly when a sticker will be earned. “Be good” is too broad because it does not tell a child what action counts. A clearer goal might be “put shoes by the door,” “place pajamas in the hamper,” or “brush teeth after the bedtime reminder.” Phrase the goal as the action you want to see rather than the behavior you want to stop.
The CDC recommends defining the desired behavior clearly and positively. It also suggests using simple words and pictures that a young child can understand. See the CDC guidance on praise and rewards A quick drawing of a toothbrush, toy basket, or pair of shoes can therefore be more useful than a decorative title that the child cannot read yet.
For a first chart, choose a modest number of spaces that feels reachable for your household. Five is an easy layout to draw, but it is a starting suggestion rather than a universal rule. If the activity happens several times per day, you might use fewer spaces. If your child already understands charts and enjoys tracking progress, a longer path may be manageable.
Materials and easy substitutions
- One sheet of paper, construction paper, or light cardstock
- Pencil and ruler, although a straightedge is optional
- Markers, crayons, or colored pencils
- A sheet or small collection of stickers
- Tape, removable poster putty, or a magnet for displaying the chart
- Optional: glue stick, child-safe scissors, decorative paper, stamps, or washi tape
- Optional reusable cover: sheet protector, laminating pouch, or clear contact paper
Use what you already have. Draw stars if you do not have stickers. A washable stamp, hook-and-loop shapes, or a dry-erase check mark can also record progress. If the child wants to decorate beyond the chart itself, these simple sticker craft ideas can provide inspiration without changing the basic system.
Cardstock is helpful when the chart will be handled frequently, but ordinary printer paper works when it will be taped to a wall or refrigerator. Mount thin paper on recycled cereal-box cardboard if it curls. If you want a coordinated theme without drawing or cutting every design, custom printed stickers are an optional embellishment rather than a requirement.
How to make a DIY reward sticker chart for kids
1. Write or draw the target action
Turn the paper horizontally or vertically and reserve the top quarter for the goal. Write a short label such as “Toys in the Basket.” Add a simple picture beside it. Ask the child to explain the picture back to you; if the meaning is unclear, simplify it before continuing.
2. Draw the progress spaces
Draw a row, grid, stepping-stone path, or winding trail. Each space should comfortably fit the stickers you plan to use. You can trace a bottle cap for circles or use a ruler for boxes. Mark the final space with a larger star, flag, or cheerful border so the finish is easy to recognize.
3. Add only useful labels
A chart for a child who cannot yet read may need only a picture and the progress spaces. For an older child, add a short title and a sentence describing the goal. Avoid packing several chores into tiny columns on the first version. If you need to track morning and evening routines separately, make two small charts instead of one crowded chart.
4. Let the child decorate the border
Keep decoration outside the working spaces so stickers remain easy to count. A child can add clouds around a rocket path, leaves around a woodland trail, or bubbles around an underwater chart. Limiting the choice to two or three colors or themes can make this step easier for a child who feels overwhelmed by a large supply box.
5. Decide what completing the chart means
Choose the finish before the first sticker is placed. The reward does not have to be an object. It might be choosing a family game, selecting the bedtime story, picking music for a dance break, or doing a favorite craft together. Select something you can provide promptly and consistently.
6. Display the chart
Place it near the relevant routine when practical: beside the shoe basket, near the toy shelf, or on the refrigerator. The CDC advises keeping a reward chart where the child can see it and giving the reward soon after the target behavior occurs. Avoid placing it where splashes, cooking grease, or constant handling will damage it.
Make the chart reusable
A reusable chart works well for a repeating routine. Slide the finished page into a transparent sheet protector and use a dry-erase marker to fill each space. You can also laminate it or cover both sides with overlapping strips of clear contact paper. Leave a margin around the paper so the covering can seal to itself.
Instead of disposable stickers, draw check marks, attach reusable hook-and-loop shapes, or use magnets on a chart mounted to a metal surface. Store loose pieces in a closed container out of reach when they are not being used, especially if younger siblings are present.
If preserving the artwork matters, make a photocopy or take a clear photograph before covering it. Contact paper can wrinkle, so peel back only a small section of the liner at a time and smooth from the center toward the edges.
How children can help at different stages
Adapt the craft to the child rather than expecting every child to complete the same steps. A younger child can select between two sticker sheets, color a border, and place earned stickers with help. A preschooler may be able to draw the goal picture or trace circles. An older child can help word the goal, measure the spaces, and choose a reasonable completion reward.
For early school-age children, paper tokens can be appropriate, while points or written agreements may be more suitable for older children, according to the American Academy of Pediatrics’ HealthyChildren guidance. The same guidance recommends treating charts as a measure of success rather than adding penalties or demerits. Read the HealthyChildren overview of reward systems
Keep adult-only tools separate. A caregiver should handle a craft knife, laminator, or paper trimmer. Follow the manufacturer’s instructions for scissors, adhesives, markers, and other supplies, including their age labels and ventilation guidance.
Using the chart without making it complicated
- Explain the exact action that earns a sticker.
- Show the child where the sticker will go.
- Give specific praise when the action happens, such as “You put the blocks in the basket after I asked.”
- Add the sticker promptly rather than saving several for later.
- When the chart is full, follow through with the agreed outcome.
- Reset the same chart only if the goal is still useful; otherwise, make a new one for the next skill.
Do not remove a sticker that has already been earned. CDC guidance specifically advises against taking away earned rewards. If a difficult moment occurs later, respond to that moment separately instead of erasing earlier progress.
If the child loses interest, simplify before abandoning the idea. Shorten the path, make the target action more specific, let the child choose the stickers, or replace a delayed prize with an immediate shared activity. A chart that repeatedly causes arguments is not serving its practical purpose; pause and reconsider the goal, timing, or format.
Optional cutting-machine version
A cutting machine can create evenly sized stars, circles, or a decorative title, but it should remain an optional finishing tool. Build the working chart by hand first so you know the layout makes sense. Then cut a few large paper shapes rather than filling the page with intricate pieces.
Material settings vary by machine, blade condition, and paper. Cricut advises selecting the setting closest to the material being used and making a small test cut before running the complete project. Check Cricut’s material-setting instructions Place the test shape in a corner of the sheet to conserve material.
Easy chart themes and routines
- Morning launch: Move a sun across the sky after getting dressed or placing a backpack by the door.
- Bedtime path: Add a moon or star after completing one clearly selected bedtime action.
- Cleanup trail: Move an animal toward its home after toys go into the correct basket.
- Reading garden: Add one flower for each agreed reading session.
- Kindness chain: Add a paper link when the specifically defined helpful action occurs.
- Seasonal chart: Use leaves, snowflakes, flowers, or beach balls while keeping the underlying goal unchanged.
Themes make the chart inviting, but clarity matters more than decoration. If a child spends more time negotiating which sticker to use than completing the routine, offer a smaller selection or place the next sticker beside the chart in advance.
Common questions
What should go on a reward chart for a toddler or preschooler?
Use one observable action, a simple picture, and clearly visible progress spaces. “Put books on the shelf” is easier to understand than “be responsible.” Keep the craft materials and the explanation simple.
What can I use instead of stickers?
Try stamps, crayon stars, dry-erase marks, paper tokens, magnets, or reusable hook-and-loop shapes. Choose pieces that are safe for the child’s age and easy to store.
Can one chart cover an entire routine?
It can, but begin with one step if the full routine feels confusing. Once the child understands the chart, you can create separate rows for a few familiar actions. Keep every row visually distinct and define exactly how each mark is earned.
Should children lose stickers for unwanted behavior?
No. Keep earned stickers as a record of completed actions. Both CDC and AAP-aligned guidance favor recognizing success rather than turning the chart into a system of removed rewards or demerits.
Start with the plain-paper version
The most useful next step is to choose one routine and draw a small row of spaces today. Add one clear picture, let the child decorate the border, and put the chart where the action happens. If the simple version is understandable and manageable, then consider a reusable cover, themed embellishments, or a more detailed routine chart.