
TLDR
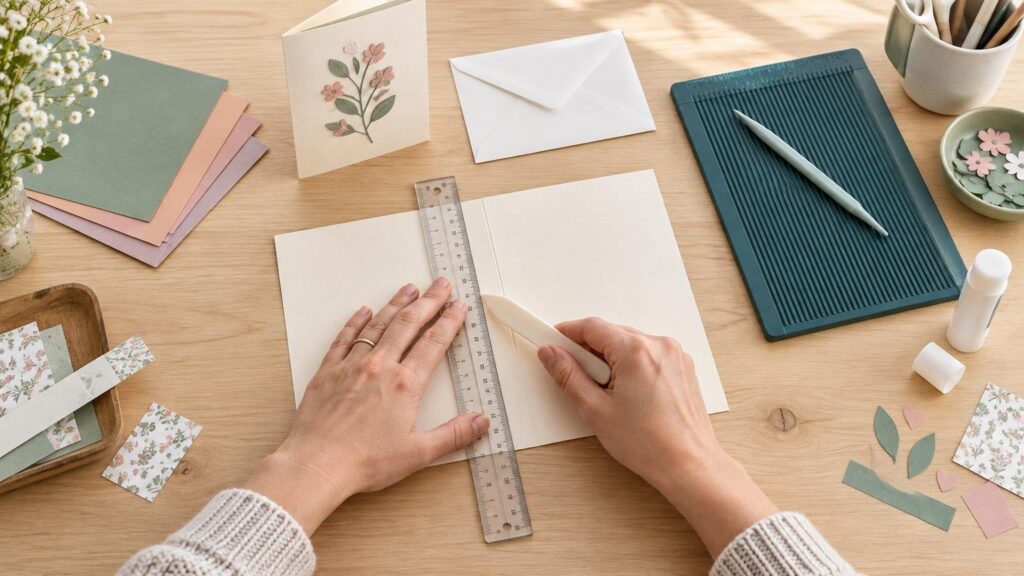
The simplest answer to how to score cardstock for greeting cards is to mark the fold accurately, place the cardstock on a firm surface, and draw a rounded scoring tool along the line with steady, even pressure. Score and fold parallel to the paper grain when possible. For a hand-scored mountain fold, the indented line goes on the outside of the finished fold. Align the card’s corners before sharpening the crease with a bone folder.
Scoring compresses a narrow line in the cardstock so the sheet has a controlled place to bend. It is particularly helpful for heavy, textured, coated, metallic, or heavily printed paper, but it cannot prevent every surface from cracking. The reliable approach is to test the grain, pressure, and fold orientation on an offcut before scoring the finished card.
What you need to score a card base
A scoring board is convenient because its channels keep the tool aligned, but it is not essential. You can make a clean card fold with a metal ruler and a suitable blunt tool. Avoid knives, needles, and other sharp points that cut or weaken the paper instead of compressing it.
- Cardstock cut square to the required card-base size
- A scoring board and stylus, or a metal ruler and rounded scoring tool
- A bone folder or another smooth, flat burnishing edge
- A pencil and measuring tool if the fold position is not built into the board
- A cardstock offcut from the same sheet for testing
A dried-out ballpoint pen can work in a pinch if its tip is smooth and it does not leave ink. Place the cardstock over a slightly yielding surface, such as a cutting mat, rather than soft fabric. If you make paper projects regularly, a scoring board is easier to repeat accurately; the same tool can also be used for projects such as a cardstock gift box made with a scoring board.
Measure the fold line accurately
Decide on the closed card size first, then double the dimension that crosses the fold. A standard side-fold A2 card finishes at 4.25 × 5.5 inches, so begin with an 8.5 × 5.5-inch rectangle and score it at 4.25 inches. The same principle works for other formats: a 5 × 7-inch side-fold card needs a 10 × 7-inch base scored at 5 inches.
| Finished card | Flat card base | Score position |
|---|---|---|
| A2 side fold | 8.5 × 5.5 inches | 4.25 inches |
| 5 × 7 side fold | 10 × 7 inches | 5 inches |
Cut the outer edges square before measuring the score. If the card base is slightly skewed, a perfectly measured center line can still produce mismatched corners. On a scoring board, place one straight edge firmly against the top guide and check that the paper has not drifted before making the groove.
Check the cardstock grain direction
Paper fibers tend to align more strongly in one direction during manufacturing. Cardstock usually bends more readily parallel to that grain and resists bending across it. Paper manufacturers Monadnock and Neenah recommend scoring parallel to the grain for a smoother fold, while also advising pretesting for heavier or double-thick cover stocks. Monadnock’s paper-folding guidance provides a useful technical explanation of this relationship.
To estimate the grain direction, hold opposite edges of the sheet and bend it gently without making a crease. Repeat with the other pair of edges. The direction that offers less resistance is usually parallel to the grain. This is a practical comparison rather than an exact laboratory test, so use an offcut when the sheet has a delicate surface.
For a side-fold card, ideally cut the base so the grain runs from the top edge to the bottom edge, parallel to the vertical fold. If the sheet size or printed design forces you to fold across the grain, scoring becomes more important. Test the proposed fold before committing a decorated or expensive sheet.
How to score cardstock for greeting cards by hand
- Place the cardstock face down or face up according to where the outside of the finished fold must be. For the manual method described here, the score indentation will become the exterior of the mountain fold.
- Align the intended fold line with a scoring-board channel. If using a ruler, measure at both ends of the line, position the ruler between the marks, and hold it firmly.
- Hold the scoring tool much like a pen. Use its rounded side or tip rather than digging in with a sharp point.
- Pull the tool along the entire line in one smooth, controlled pass. Keep the angle and pressure consistent from one edge to the other.
- Inspect the line. It should be visible and continuous but should not look torn, fuzzy, or sliced.
- Bring the card’s corners together loosely, confirm that all edges align, and then close the fold.
- Burnish from the center toward the ends with the flat edge of a bone folder. Use enough pressure to set the crease without repeatedly rubbing a sensitive finish.
Scor-Pal’s instructions similarly recommend holding the tool like a pen, avoiding the point, and using firm, even pressure. They also suggest flattening the finished fold with the tool’s flat edge.
Which way should a hand-scored card fold?
For the manual mountain-fold method, keep the score depression on the outside of the finished card and bring the unscored side together on the inside. Think of the card as a tent: the groove sits over the tent’s peak. Both Scor-Pal and Monadnock describe this orientation for a hand-scored fold.
- Outside of card: visible score indentation
- Fold peak: score line follows the outside ridge
- Inside of card: raised or displaced side of the score
This instruction should not be treated as a universal rule for every machine and scoring system. Machine manufacturers can specify a different orientation based on how their tool forms the line, so follow the relevant machine workflow rather than transferring the manual rule automatically.
How hard should you press?
Use the lightest pressure that creates a continuous groove and a cooperative fold. There is no single pressure setting that works for every cardstock because thickness, fiber structure, coating, texture, grain direction, and tool shape all affect the result.
Make a test score on an offcut from the same sheet. Fold it exactly as you intend to fold the card, then examine both sides under good light. If the sheet fights the fold, increase pressure slightly or make a second controlled pass. If the line looks cut, fuzzy, or pale before folding, reduce the pressure.
Several light passes are not automatically safer than one pass. Repeatedly dragging a tool along the same line can abrade a coating or cause the tool to wander. Start with one smooth pass; add another only if the test piece shows that the stock needs it.
Adjust the method for heavy or printed cardstock
Heavier cardstock generally needs a more deliberate score, but weight alone does not predict how a sheet will behave. A dense smooth stock, fibrous cover paper, metallic finish, and laminated sheet can all react differently at a similar nominal weight. If you are still selecting a card base, this guide to 65 lb, 80 lb, and 100 lb cardstock for paper crafts explains the practical differences between common cover weights.
Dark printing and toner can make cracking more noticeable because a pale paper core becomes visible along the fold. Mohawk notes that toner coverage over a fold can crack in digitally printed work and identifies scoring before folding as one way to help reduce the problem. Scoring may reduce visible damage, but it cannot guarantee a crack-free result when a coating, toner layer, or brittle surface cannot tolerate the bend.
- Heavy cardstock: test a firmer score and confirm the fold direction before using the finished piece.
- Textured cardstock: score from the side that gives the tool a stable path, then verify the appearance of the final exterior.
- Metallic or coated stock: use a polished, rounded tool and avoid repeated burnishing over the decorative surface.
- Printed cardstock: keep dense toner or ink coverage away from the fold when the design permits.
- White-core cardstock: expect any surface split to show more clearly on dark colors; use gentler pressure and fold parallel to the grain where possible.
Hand scoring is well suited to individual cards and short handmade batches. For a large event suite, consistency may matter more than maintaining a fully handmade workflow; custom printed invitations are an alternative when the project has moved beyond one-off greeting cards.
Scoring cardstock with a Cricut
Keep Cricut instructions separate from the hand-scoring orientation above. Cricut’s guidance distinguishes between the single and double Scoring Wheels: it lists everyday 80 lb cardstock as a use case for the single wheel and heavy 100 lb-plus cardstock for the double wheel. The double Scoring Wheel is intended for compatible Cricut Maker machines, and Cricut instructs users to fold into the score line in this workflow. Cricut’s official Scoring Wheel instructions include the current compatibility and operating guidance.
Cricut also states that Scoring Wheel pressure is not user-adjustable. Selecting More or Less changes cutting pressure rather than scoring pressure. If a machine-scored fold is unsatisfactory, do not assume a cutting-pressure change will fix it. Check the selected material, tool, machine compatibility, mat adhesion, grain direction, and fold orientation instead.
For readers new to the machine workflow, getting started with Cricut for crafting provides broader setup context. Always make a small test with the actual cardstock before running a decorated card base or a full batch.
Troubleshooting uneven or cracked folds
| Problem | Likely cause | What to try |
|---|---|---|
| Cardstock cracks at the fold | Fold crosses the grain, surface is brittle, or pressure is unsuitable | Rotate the layout if possible, test a gentler score, and avoid dense printing directly over the fold. |
| Score line tears or looks fuzzy | Tool is too sharp or pressure is excessive | Use a rounded tool and reduce pressure. Replace any stylus with a damaged tip. |
| Fold is crooked | Card was cut out of square, paper shifted, or tool wandered | Square the base, mark both ends of the fold, and secure the ruler or use a board channel. |
| Edges do not align | Fold was closed before the corners were positioned | Bring the corners together loosely, adjust them, and burnish only after alignment. |
| Fold springs open | Stock is stiff, score is too shallow, or crease is not set | Test a slightly stronger score, fold parallel to the grain, and burnish once with a flat edge. |
| White line appears | Printed or colored surface has split and exposed the core | Reduce pressure, improve grain alignment, or choose a through-colored stock for future cards. |
If a fold fails repeatedly, change one variable at a time. Start with grain direction, then test pressure, tool shape, and fold orientation. This makes it easier to identify whether the problem comes from the cardstock or the method instead of deepening the score until the sheet tears.
A reliable card-scoring routine
For consistently clean greeting-card folds, cut the base square, plan the fold parallel to the grain, and test the scoring pressure on an offcut. Make one smooth score, keep the hand-scored indentation on the outside of the mountain fold, align the corners, and burnish the crease once. For machine scoring, follow the manufacturer’s stated tool and fold orientation rather than assuming the manual method applies.
Begin with the A2 example if you want an easy practice project: cut an 8.5 × 5.5-inch base, score at 4.25 inches, and inspect the test fold before decorating. A few seconds spent checking grain and pressure can save an otherwise finished card from a cracked or uneven center fold.