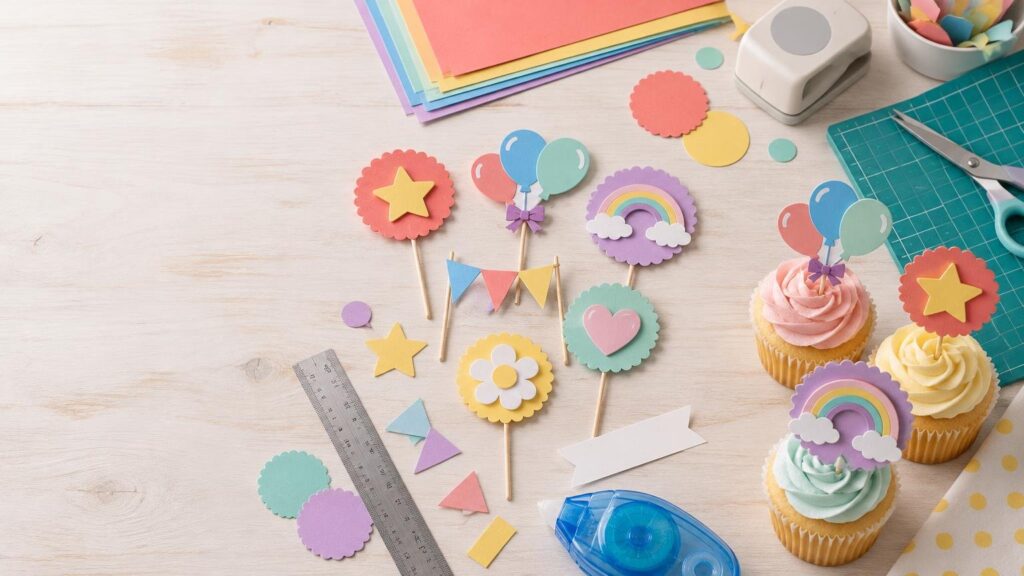
DIY birthday cupcake toppers are a quick way to carry a party theme across the dessert table without decorating every cupcake by hand. A simple topper can feature the guest of honor’s name, age, initials or a recognizable shape such as a star, crown, balloon or dinosaur.
For a dependable result, make each topper about 1.75 to 2.25 inches wide, use medium-weight cardstock for the visible design and attach it to a food-safe pick. Keep the paper and adhesive above the frosting. You can cut the pieces with scissors, a craft punch or a cutting machine, so this project works with tools you may already own.
Materials for a Complete Batch
- Medium cardstock in two or three coordinating colors
- Food-safe cupcake picks or cocktail picks intended for use with food
- Paper trimmer, scissors, craft punch or electronic cutting machine
- Light-tack paper glue, glue dots or a low-temperature hot-glue gun
- Ruler and pencil
- Optional home printer for printed names, numbers or artwork
- Optional light or medium-grip cutting mat and fine-point blade
- Cupcakes plus a tray, cake stand or covered container for presentation
Medium cardstock is a useful starting point because it holds its shape without making small designs unnecessarily difficult to cut. Cricut classifies 65 lb stock as light cardstock, 80 lb stock as medium and 100 lb stock as heavy. For a closer look at how these weights behave, see this guide to 65 lb, 80 lb and 100 lb cardstock for paper crafts. Cricut’s classification corresponds to approximately 176, 216 and 270 gsm, respectively.
Use 80 lb cardstock for most single-layer toppers. Choose 65 lb stock for printed pieces that will be glued onto a sturdier backing. Reserve 100 lb or glitter cardstock for broad, uncomplicated silhouettes, because tiny interior cuts become harder as the material gets thicker.
Choose a Design That Stays Readable
Begin with one repeatable shape rather than giving every cupcake a different design. Circles, scalloped circles, flags, arches and broad stars are easy to batch and leave room for personalization. A topper around 2 inches wide is large enough to read while remaining in proportion to a standard cupcake.
Keep names short and use thick lettering. If the child’s full name will not fit clearly, alternate an initial with the birthday age. For example, a batch of 24 could include eight name toppers, eight number toppers and eight themed shapes. That creates variety without requiring 24 individual layouts.
Layering makes simple designs look finished. Cut a 2-inch decorative front and place it over a backing approximately 0.125 to 0.2 inch larger on every side. Cutting-machine software can create this backing as an offset or shadow layer. Cricut supports layered cardstock designs and offset layers for this purpose.
| Topper style | Suggested size | Best material approach |
|---|---|---|
| Simple circle or arch | 1.75–2 inches wide | One layer of 80 lb cardstock |
| Name or age topper | About 2 inches wide | Printed or cut front on a contrasting backing |
| Detailed themed shape | 2–2.25 inches wide | Simplified 65 or 80 lb design |
| Glitter accent | Up to 2.25 inches wide | Broad glitter shape with a plain cardstock layer |
Cut the Toppers by Hand or Machine
Hand-cut method
For the lowest-friction version, print or trace a sheet of circles, cut them with scissors and glue them onto slightly larger punched or hand-cut backings. A 2-inch circle punch is especially useful for producing a consistent batch. Write names with a paint marker, add number stickers or glue on small paper shapes after cutting.
Cutting-machine method
Place paper or light cardstock on a LightGrip mat and medium cardstock on a StandardGrip mat. Cricut recommends a StrongGrip mat for heavy or glitter cardstock. Its cardstock cutting instructions also recommend making a test cut with the actual material before committing to the full project.
Test the smallest or most detailed design first. If corners lift, letters tear or interior shapes fail to release, enlarge the topper or simplify the troublesome details. Cricut’s guidance for intricate cardstock calls for a fine-point blade and, for listed machine-and-material combinations, two cutting passes.
Once the test succeeds, duplicate the design to fill the mat. Keep copies aligned in rows so it is easy to count them and pair front pieces with backings. After cutting, turn the mat face down and bend the mat away from the cardstock. This removal method helps reduce curling.
Print Then Cut method
Print Then Cut is useful for multicolor illustrations, photos or personalized text that would be tedious to assemble from separate layers. A single design layer can be converted to Print Then Cut, while multi-layer artwork can be flattened into one printed image with an outer cut contour.
Use matte, non-reflective printable material for reliable sensor-mark detection. Glitter, metallic, glossy, epoxy-coated and some embossed papers can interfere with the machine’s ability to read those marks. Cricut also directs users to select the highest available print-quality setting, turn off fit-to-page scaling, use portrait orientation and print one project page per sheet. Its complete Print Then Cut instructions cover compatible workflows and machine requirements.
Print and cut the project in the same Design Space session. Original Cricut Joy machines do not support Print Then Cut, although Cricut lists Joy Xtra, Joy 2, Explore, Maker and Venture families among compatible options.
Assemble the Toppers Cleanly
- Arrange all front pieces face down and pair them with their backings.
- Position a pick vertically on the back of each design, with enough length below the paper to stand securely in the cupcake.
- Attach the pick near the center using a small glue dot or dab of adhesive.
- Cover the attachment point with the backing layer. Press the layers flat until the adhesive holds.
- Let the finished toppers dry completely before packing or placing them near food.
For a single-sided design, the pick and adhesive may remain visible from the back. A second matching shape hides the join and gives the topper a finished appearance from both sides. Make one sample before assembling the batch so you can check the height, balance and viewing angle on an undecorated cupcake liner or a stand-in made from a small paper cup.
Keep Craft Materials Out of the Food
Treat the cardstock portion as a non-edible decoration. Ordinary craft paper, printer ink and hobby adhesive should not be assumed suitable for direct food contact simply because a package calls them non-toxic. The FDA’s food-contact information explains that paper, adhesives and colorants used in food-contact articles are regulated according to their intended use and composition.
Plan the Batch Without a Last-Minute Rush
Count the cupcakes and make two or three spare toppers. Then separate production into short stages: finalize one design, test one cut, cut all fronts, cut all backings and assemble the full batch. This is faster and more consistent than completing each topper from beginning to end before starting the next.
Store finished toppers flat in a shallow box, with parchment or clean tissue between layers if the surfaces could scuff. Add them to cupcakes shortly before display rather than transporting cupcakes with tall toppers already inserted. For the table, repeat the same two or three colors in the cupcake liners, serving tray or a small folded-cardstock food label. A coordinated batch will look intentional even when the individual topper design is very simple.
A Reliable Birthday Topper Formula
For an easy first batch, cut 2-inch circles from 80 lb cardstock, add a contrasting offset backing, alternate the child’s name with their age and mount each design on a food-safe pick. Test one finished topper on the actual cupcake, then batch the rest. That small trial catches proportion, cutting and assembly problems before they multiply—and leaves you with party decorations that are personal, readable and ready for the dessert table.
Frequently Asked Questions
What size should cardstock cupcake toppers be?
Aim for about 1.75 to 2.25 inches wide. A 2-inch design is a dependable starting point for a standard cupcake.
What cardstock weight works best for cupcake toppers?
Use 80 lb medium cardstock for most single-layer toppers. Use 65 lb stock for printed fronts attached to a sturdier backing, and reserve 100 lb or glitter cardstock for broad, simple shapes. Cricut classifies these weights as light, medium and heavy cardstock.
Can I make cupcake toppers without a cutting machine?
Yes. Print or trace simple shapes, cut them with scissors and attach them to slightly larger backings. A 2-inch circle punch can make a batch faster and more consistent.
How can I personalize toppers when a full name is too long?
Use thick lettering and alternate a short name or initial with the birthday age and a themed shape. This keeps every topper readable while preserving variety.
Which Cricut mat should I use for cardstock?
Use a LightGrip mat for paper or light cardstock, StandardGrip for medium cardstock and StrongGrip for heavy or glitter cardstock. Test the actual material before cutting the full batch.
Can I use Print Then Cut for cupcake toppers?
Yes. It works well for photos, multicolor artwork and personalized text. Use matte, non-reflective printable material and complete printing and cutting in the same Design Space session. Original Cricut Joy machines do not support Print Then Cut.
How do I keep cardstock cupcake toppers food-safe?
Treat the paper design as non-edible. Use picks intended for food, keep cardstock and adhesive above the frosting, and remove the topper before eating. A non-toxic label alone does not establish suitability for direct food contact.
What is the easiest way to produce a large batch?
Finalize one design, test one cut, cut all fronts, cut all backings and then assemble everything. Make two or three spares, store the finished toppers flat and insert them shortly before display.
References
- Cricut Cardstock Instructions – Help Center
- Which materials can I cut with my Cricut smart cutting machine? – Help Center
- Troubleshoot Cricut Maker 5 projects that don't turn out as expected – Help Center
- Food Packaging & Other Substances that Come in Contact with Food – Information for Consumers | FDA
- FDA Advises Home and Commercial Bakers to Avoid Use of Non-Edible Food Decorative Products | FDA
- Cricut Materials Cheatsheet
- How to Print Then Cut in Design Space – Help Center
- Print Then Cut – Compatible Materials – Help Center