
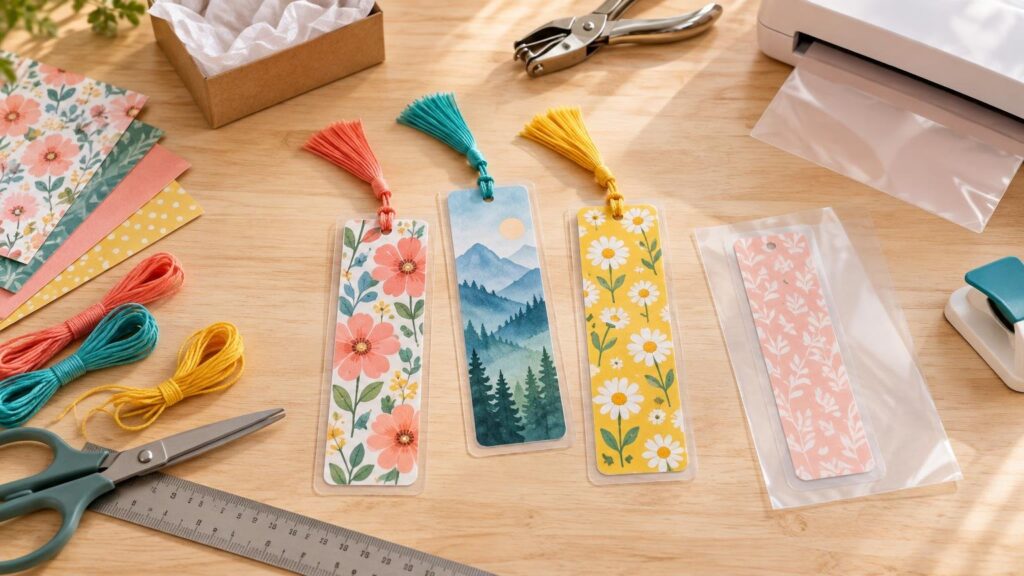
A laminated cardstock bookmark is an easy handmade gift that can look surprisingly polished. Start with a flat piece of medium-weight cardstock, add a name or original design, laminate it, and finish it with rounded corners or a tassel. A 2 x 6-inch bookmark works well for most books, while a 2.25 x 7-inch version gives artwork and longer names more room.
The most dependable workflow is to print or decorate the cardstock, cut the bookmark to its final paper size, and then laminate it. After the pouch cools, trim around the bookmark while leaving a narrow sealed border. This sequence avoids asking a home printer or cutting machine to handle an unnecessarily thick laminated stack.
Choose a size and design style
Use 2 x 6 inches for a compact bookmark or 2.25 x 7 inches for a more substantial gift. These are practical project dimensions rather than mandatory standards. If you are creating a coordinated set, choose one size and repeat it so the finished bookmarks line up neatly in their packaging.
Plan the artwork inside the cut line instead of placing important text directly against the edge. A comfortable layout might include a small illustration at the top, a name or phrase through the center, and a simple pattern or date near the bottom. Useful personalization ideas include:
- A first name, initials or monogram
- A short reading-themed phrase
- A child’s original drawing
- A favorite color palette or simple geometric pattern
- A meaningful date, such as a birthday or graduation
- A small photograph with enough clear space for trimming
- A matching set labeled for different book genres
Use artwork you created or have permission to reproduce. For a bookmark featuring a photograph, crop the image around the narrow vertical shape before printing. The same preparation principles used for photos in personalized DIY gifts can help prevent important faces or details from being clipped.
Materials and tools
- Smooth cardstock compatible with your printer or cutting machine
- A home printer, markers or other flat decorating supplies
- Paper trimmer, craft knife and ruler, or cutting machine
- Thermal laminator and compatible pouches, or self-sealing laminating sheets
- Corner rounder or scissors
- Single-hole punch, if adding a tassel
- Embroidery floss, narrow ribbon or lightweight cord
- Optional gift packaging: glassine bag, paper sleeve, envelope or folded cardstock holder
Flat decoration is important. Scotch guidance says items placed in its laminating pouches should generally be no thicker than cardstock, so bulky gems, foam pieces, buttons and layered chipboard are poor choices for the laminated portion of this project. Scotch laminating guidance also provides the relevant pouch-loading and trimming instructions.
Pick cardstock that suits your equipment
For most bookmarks, 65 lb or 80 lb cardstock offers a useful balance: it feels more substantial than ordinary printer paper but remains manageable for printing and cutting. Heavier 100 lb cardstock can produce a firmer core, although it is more likely to exceed a printer’s supported media range once texture and coating are considered. For a closer comparison, see this guide to 65 lb, 80 lb and 100 lb cardstock for paper crafts.
Do not assume every home printer accepts every cardstock weight. Capacity depends on the printer and feed path. One Epson manual, for example, permits cardstock up to 68 lb or 256 gsm through its rear feed, but that specification cannot be applied to other models. Check your printer manual and use the recommended tray or rear feed.
If you are decorating by hand, choose smooth cardstock for crisp lettering. Avoid thick paint, dimensional adhesive and raised embellishments. Colored pencils, markers and other flat media are easier to seal, but let any ink dry completely before placing the bookmark in a pouch.
| Material choice | Best use | Watch for |
|---|---|---|
| 65 lb cardstock | Easy printing, classroom batches and lightweight bookmarks | May feel flexible before lamination |
| 80 lb cardstock | A balanced choice for most gift bookmarks | Confirm printer compatibility |
| 100 lb cardstock | Firm hand-cut or machine-cut bookmark cores | May be too heavy for some printers |
| Self-sealing laminate | No-heat projects and occasional crafting | Apply slowly to limit bubbles |
| Thermal pouch | Smooth, fully enclosed finish | Use the pouch and laminator settings specified by the manufacturer |
Print and cut the cardstock
Create a rectangle at your chosen size and keep names, faces and important decorative details slightly inside its edges. Print one plain-paper draft before using cardstock. Check the physical dimensions, spelling, image crop and color, then print the final version at 100% scale unless your software’s workflow specifically directs otherwise.
For a simple rectangular design, a paper trimmer is usually faster than a cutting machine. Markers and a metal ruler also make a hand-cut bookmark possible; cut with several controlled passes rather than forcing the blade through the cardstock in one stroke.
Using a Cricut for the cardstock
Cricut lists settings for 65 lb, 80 lb and 100 lb cardstock, generally using a Fine-Point blade. Its cardstock cutting instructions recommend a test cut because materials vary. Cricut also advises turning the mat over and peeling the mat away from the cardstock to reduce curling.
A basic cut design can be made from solid-colored cardstock and decorated afterward. For a printed design, Print Then Cut adds registration marks that the machine scans before cutting. Cricut recommends selecting high print quality, avoiding page scaling such as “fit to page,” and completing the process in one Design Space session. Cricut’s Print Then Cut instructions explain the current workflow.
Complete the machine cutting before lamination unless you have tested the exact combination of machine, laminate and cardstock. Glossy and reflective surfaces can interfere with Print Then Cut sensors, and compatibility with a specific laminated printable product does not establish that every homemade laminated cardstock stack will work.
Laminate without losing the sealed edge
Use the setting specified for the pouch and laminator. Scotch says its letter, legal and menu pouches use a 3 mil setting, while many smaller pouch formats use 5 or 6 mil. Because products differ, the package instructions take priority. When uncertain, 3M advises starting with the lower setting and increasing it if the lamination quality is poor.
No laminator is available? Self-sealing pouches are a practical alternative. These peel-and-seal products do not require heat or electricity. Position the cardstock carefully before pressing the adhesive surfaces together because correcting a crooked placement can be difficult once they touch.
Trim and finish the bookmark
Once the laminated sheet is completely cool, cut around each bookmark while preserving a visible sealed border. If two pieces were spaced 1/2 inch apart, cutting midway between them leaves about 1/4 inch of laminate beside each piece. Use the same border width on all four sides for a deliberate finish.
Round the laminated corners with a corner punch or scissors. This removes sharp points and helps the bookmark feel finished. Inspect every edge before packaging it. If an area has opened or separated, do not trim it closer in an attempt to hide the problem; remake or relaminate the piece according to the product instructions.
For a tassel, punch a hole near the top while keeping the hole inside the sealed laminate perimeter. That placement is a practical way to preserve sealed material around the cardstock. Thread folded embroidery floss or narrow ribbon through the hole and pass the loose ends through the loop. Keep the tassel short enough that it does not overwhelm the bookmark.
Another option is to leave the bookmark untasseled and add a small dry-erase reading tracker. 3M states that dry-erase marker can be wiped from laminated material, but test the particular marker on a scrap because staining performance can vary.
Turn one bookmark into a coordinated gift
Presentation is what moves this project from useful craft to finished gift. Make a set of two or three bookmarks in the same palette, changing the name, phrase or small illustration on each one. Because multiple cardstock pieces can share a pouch when properly spaced, producing a coordinated set does not require laminating every bookmark separately.
Package a single bookmark in a narrow glassine bag or tuck it into a folded cardstock sleeve. For a set, wrap the bookmarks with a paper band printed with “A little something for your next chapter,” the recipient’s name or a brief handwritten message. Place tassels in the same direction and align all edges before sliding the set into its holder.
Before giving the gift, check the spelling, sealed edges, corners, tassel knot and surface for dust or fingerprints. A simple bookmark with clean spacing and careful finishing will usually look more polished than one crowded with extra embellishments.
A reliable final plan
For the easiest successful version, use smooth 65 lb or 80 lb cardstock, make a 2 x 6-inch design, print and cut it before lamination, and preserve an even sealed border when trimming. Add rounded corners and one restrained personal detail—a name, monogram, photograph or short phrase. Finish with a matching tassel or paper sleeve, and the result is a practical handmade gift ready to slip inside a book.
References
- FAQ | 3M United States
- files.support.epson.com
- Cricut Cardstock Instructions – Help Center
- How to Print Then Cut in Design Space – Help Center
- Print Then Cut – Compatible Materials – Help Center
- Which materials can I cut with my Cricut smart cutting machine? – Help Center
- Scotch™ Self-Sealing Laminating Pouches | 3M United States