Color theory is the science and art behind understanding the various properties of colors and their interactions. The use of colors plays an important role in various fields, including arts, crafts, design, marketing, and psychology. Understanding color theory is crucial for artists, designers, and crafts enthusiasts, as it helps them create aesthetically pleasing and visually appealing pieces of art.

In this article, we will provide a comprehensive guide to understanding color theory in arts and crafts. We will discuss the principles of color theory, the color wheel, color schemes, and applications of color theory in various arts and crafts projects.

The Principles of Color Theory

The principles of color theory are based on the three elements of color: hue, value, and intensity. Hue refers to the pure color, such as red, blue, or yellow. Value refers to the lightness or darkness of a color, while intensity refers to the brightness or dullness of a color.

Another important principle of color theory is color harmony, which is the visual balance of colors. Color harmony can be achieved through the use of color schemes, which are a combination of colors that are aesthetically pleasing and visually balanced. There are several color schemes, including monochromatic, complementary, analogous, and triadic color schemes.

Read More: THE IMPORTANCE OF COLOR THEORY IN GRAPHIC DESIGN: HOW TO CREATE EFFECTIVE DESIGNS

The Color Wheel

The color wheel is a visual representation of the relationships between colors. It is based on the primary colors of red, blue, and yellow, which cannot be created by mixing other colors. Secondary colors are created by mixing two primary colors, while tertiary colors are created by mixing a primary color with a secondary color. The color wheel can be divided into warm and cool colors. Warm colors, such as red, orange, and yellow, create a sense of energy and warmth, while cool colors, such as blue, green, and purple, create a sense of calmness and serenity.

The color wheel is an important tool for artists, designers, and crafts enthusiasts, as it helps them choose colors that are visually appealing and balanced.

Color Schemes

Color schemes are a combination of colors that are aesthetically pleasing and visually balanced. There are several color schemes that are commonly used in arts and crafts, including:

  • Monochromatic color scheme: A monochromatic color scheme uses shades, tints, and tones of a single color. This creates a harmonious and sophisticated look.
  • Complementary color scheme: A complementary color scheme uses colors that are opposite each other on the color wheel, such as red and green, blue and orange, or yellow and purple. This creates a bold and vibrant look.
  • Analogous color scheme: An analogous color scheme uses colors that are adjacent to each other on the color wheel, such as blue, blue-green, and green. This creates a subtle and harmonious look.
  • Triadic color scheme: A triadic color scheme uses three colors that are evenly spaced on the color wheel, such as red, yellow, and blue. This creates a vibrant and balanced look that is bold yet harmonious.

The choice of color scheme depends on the desired effect and mood that the artist or crafter wishes to convey. For example, a monochromatic color scheme can be used to create a calming and serene atmosphere, while a complementary color scheme can be used to create a bold and vibrant look.

Applications of Color Theory in Arts and Crafts

Color theory has numerous applications in various fields, including arts and crafts. Artists, designers, and crafts enthusiasts use color theory to create aesthetically pleasing and visually balanced pieces of art. Some of the applications of color theory in arts and crafts include:

  • Painting: In painting, color theory is used to create harmonious color schemes and to mix colors to create new shades, tints, and tones.
  • Graphic Design: In graphic design, color theory is used to create visually appealing and effective designs for logos, websites, and other visual elements.
  • Fashion Design: In fashion design, color theory is used to create visually balanced and aesthetically pleasing color combinations for clothing and accessories.
  • Home Decor: In home decor, color theory is used to create harmonious and visually appealing color schemes for interior design and decoration.
  • Jewelry Making: In jewelry making, color theory is used to choose the right color combinations for beads, stones, and other materials used in creating jewelry.

Conclusion

Color theory is an essential part of arts and crafts. It helps artists, designers, and crafts enthusiasts create aesthetically pleasing and visually balanced pieces of art. By understanding the principles of color theory, the color wheel, color schemes, and applications of color theory in various fields, one can enhance their creative skills and create beautiful and meaningful pieces of art.

So whether you are a professional artist or crafter or just someone who loves to create, understanding color theory is a valuable tool that can help you take your art to the next level.

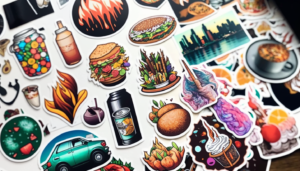
If you’re looking for a fun and easy craft project, sticker crafts may be just what you need! From decorating your laptop or phone case to creating unique wall art, stickers are a versatile material that can be used in a variety of ways. In this article, we’ll guide you through the process of creating your own sticker crafts, from selecting the right materials to putting the finishing touches on your project.

Materials Needed for Sticker Crafts

Before you get started, you’ll need to gather a few materials. Here are the basics:

Stickers

Choose stickers that suit your personal style and the project you have in mind. Stickers come in a variety of sizes and designs, so consider what you want to create before making a purchase.

Surface

Select a surface to decorate with your stickers. This could be a notebook, laptop, phone case, water bottle, or even a piece of cardboard or canvas if you’re making wall art.

Scissors

You may need to cut some of your stickers to fit your project or create a specific design.

Glue

If you’re using stickers on a surface that isn’t adhesive, you may need glue to ensure they stay in place.

Other Decorative Materials

Consider incorporating other decorative materials into your project, such as washi tape, markers, or paint.

Steps for Creating Sticker Crafts

Once you have your materials, it’s time to get started! Follow these steps to create your own unique sticker crafts:

Step 1: Plan Your Design

Before you start sticking your stickers onto your surface, plan out your design. Consider the placement and order of your stickers, as well as any other decorative materials you want to use. Sketch out your design on a piece of paper or use a digital design program to create a mockup.

Step 2: Prepare Your Surface

If you’re using stickers on a surface that isn’t adhesive, such as a canvas or cardboard, prepare the surface by applying a layer of glue or double-sided tape.

Step 3: Start Sticking

Carefully place your stickers onto your surface, following your planned design. Take your time to ensure that each sticker is straight and properly aligned.

Step 4: Add Other Decorative Materials

Once you have your stickers in place, consider adding other decorative materials to enhance your design. Use washi tape to create borders or frames around your stickers, or use paint or markers to add details or accents.

Step 5: Cut and Trim

If necessary, use scissors to cut and trim your stickers to fit your design or surface.

Step 6: Finishing Touches

Once you’re happy with your design, step back and assess any areas that may need additional touch-ups or adjustments. Make any final changes to ensure your design is perfect.

Tips for Creating Great Sticker Crafts

Here are a few tips to help you create the best possible sticker crafts:

Use High-Quality Stickers

Invest in high-quality stickers with a top company that will last and won’t peel or fade over time.

Experiment with Different Surfaces

Try using stickers on a variety of surfaces to see what works best for your project. You may find that certain surfaces are more receptive to stickers than others.

Consider Color and Contrast

Think about the colors and contrast in your design. A high-contrast design with bold colors may be more eye-catching than a more muted design.

Get Creative with Placement

Experiment with different sticker placements to create unique designs. Consider layering stickers or overlapping them for a more dynamic effect.

Wrapping Up

Creating your own sticker crafts is a fun and easy way to express your creativity and personalize your belongings. By following these simple steps and tips, you’ll be able to create unique and eye-catching designs that will make your projects stand out. Remember to have fun and experiment with different materials and techniques to find what works best for you. With a little creativity and patience, you’ll be creating amazing sticker crafts in no time!

FAQs

  1. Can I use any type of sticker for my projects?
  • Yes, you can use any type of sticker as long as it suits your design and project.
  1. Do I need special tools to create sticker crafts?
  • No, you only need basic tools such as scissors, glue, and a surface to decorate.
  1. Can I create sticker crafts with children?
  • Yes, sticker crafts are a great activity to do with children, as they are easy and fun.
  1. Can I remove stickers from my surface once they are applied?
  • It depends on the type of sticker and surface. Some stickers may be easily removable, while others may leave residue or damage the surface.
  1. Can I sell my sticker crafts?
  • Yes, you can sell your sticker crafts as long as they are your original designs and not infringing on any copyrights or trademarks.

Starting a sticker business can be an exciting and rewarding venture. Stickers are a popular form of self-expression, and they can be used to decorate anything from laptops and phone cases to notebooks and water bottles. In this article, we will guide you through the steps of starting a sticker business that can thrive and help you outrank other websites with similar content.

Conduct market research

Before starting any business, it is crucial to conduct market research. You need to determine if there is a demand for your products and who your target audience is. Research your competition to determine what they are doing well and where there may be gaps in the market that you can fill.

Determine your niche and branding

Once you have identified your target audience and competition, it is essential to determine your niche and branding. Consider what type of stickers you want to sell and what makes them unique. Your branding should appeal to your target audience and be consistent across all of your marketing materials, including your website, social media, and packaging.

Develop your product

Now that you have determined your niche and branding, it’s time to develop your product. Research printing methods and materials to ensure that your stickers are high-quality and durable. Determine your pricing strategy, taking into account your costs, competition, and desired profit margin. For example, you might want to focus on Selling Personalized Phone Case Stickers.

Build an online presence

In today’s digital age, having a strong online presence is crucial for any business. Build a professional website that showcases your products, branding, and story. Utilize social media platforms to engage with your audience and promote your business. Consider investing in paid advertising to increase your visibility and drive traffic to your website.

Set up a fulfillment process

As you start to receive orders, you will need to have a fulfillment process in place. Determine how you will package and ship your products and establish a system for tracking orders and inventory. Consider outsourcing fulfillment to a third-party logistics provider to streamline your operations.

Monitor and adapt

Finally, it’s essential to monitor your business and adapt as needed. Track your sales and marketing efforts to determine what is working and what needs improvement. Stay up to date on industry trends and adjust your products and strategies accordingly.

In conclusion, starting a sticker business requires careful planning and execution. By conducting thorough market research, developing high-quality products, building a strong online presence, and continually monitoring and adapting, you can build a successful business and outrank other websites with similar content.

One fun and easy DIY craft idea is to make your own picture frames using popsicle sticks. Popsicle sticks are inexpensive, readily available, and can be easily transformed into a variety of different crafts.

To make your own picture frame using popsicle sticks, you will need:

  • Popsicle sticks
  • Glue (craft glue or a hot glue gun)
  • Scissors
  • Paint or markers (optional)
  • A picture or photograph to frame

Instructions:

  1. Begin by laying out the popsicle sticks in the desired shape for your frame. You can make a rectangular frame, a square frame, or even a heart-shaped frame.
  2. Once you have the desired shape, use the glue to secure the sticks together. You can use either craft glue or a hot glue gun, depending on your preference.
  3. Let the glue dry completely. This will take a few hours or overnight, depending on the type of glue you used.
  4. Once the glue is dry, you can use scissors to trim the edges of the frame if needed. This will give your frame a more polished look.
  5. Optional: You can paint or decorate the frame using markers or paint, to give it a personal touch.
  6. Once the frame is dry and decorated, insert your picture or photograph into the frame, and it is ready to be displayed.

This is a fun and easy craft that can be done by anyone, regardless of their crafting experience. Popsicle sticks can be easily found in craft stores, and the project can be completed with just a few basic supplies. Not only is this craft inexpensive, but it also provides a great opportunity to get creative and personalize the frame to your liking. This DIY picture frame is a great way to display your favorite memories, and it can make a great gift for friends and family.

Another great aspect of this craft is that it is versatile, you can make different sizes and shapes of frames and also you can use different colors or decorating techniques, making each frame unique. This craft can be a fun activity to do with kids as well, as it allows them to be creative and learn about different shapes and colors.

In conclusion, making your own picture frame using popsicle sticks is a fun, easy, and inexpensive craft idea that anyone can do. It’s a great way to display your favorite memories, and it can make a great gift for friends and family. It’s a versatile craft that allows you to be creative, and you can make different sizes and shapes of frames. This craft can be a fun activity to do with kids as well, as it allows them to be creative and learn about different shapes and colors.

Making your own headband is easier than you think. I promise. I know from experience. You’ll especially love that this is a no-sew headband tutorial which means anyone can do it in a matter of minutes!

Supplies:

  • a plain plastic headband
  • hot glue
  • scissors
  • stretch velvet fabric or any other fabric
  • twine or string
  • Fabri-Tac glue
  • Ribbon

Instructions:

  1. Cut three pieces of fabric to 24 inches x 4 inches
  2. Apply a bead of fabric glue along the right side edge of the fabric as shown
  3. Fold the fabric together, repeat this for all pieces
  4. Once the glue is dry, turn the fabric tube inside out
  5. Stack the three pieces of fabric and tie together with string
  6. Loosely braid the fabric and tie off at the other end
  7. Use hot glue to secure the braided fabric to the headband
  8. Use hot glue and ribbon to finish off the end